GoShare Dashboards Explained#
How to Access the Dashboards
Every User has a personal dashboard comprised of their sending history. Access by selecting ‘Dashboard’ from the settings ![]() cog.
cog.
Additional dashboards are available for users with Branch/Segment, or Org admin capability.
Access by selecting ‘Admin’ from the settings ![]() cog.
cog.
| Dashboard | Who has access | How to access | Data | Example |
| User Dashboards | All GoShare users | Via “Cog” menu / select “Dashboard” | Only the logged in user | Health Professional |
| Branch Admin Dashboards | GoShare users with Branch Admin capability | Via “Cog” menu / “Admin” – then select “Dashboard” Tab | All users within the logged in user’s Branch | GP Practice, or a Hospital department etc. |
| Segment Dashboard | GoShare users with “Segment Reporter Role” | Via “Cog” menu / “Admin” – then select “Segment Dashboard” Tab | All users and branches allocated to that “Segment” (aka “Managed by”) | LHD, Health service, A grouping of GP Practices |
| Organisation Admin Dashboards | GoShare users with Org Admin capability | Via “Cog” menu / “Admin” – then Org Dashboard is on the “Organisation details” tab | All users across all branches within the logged in user’s Organisation | A PHN, Govt Health Agency, or a company etc. |
Real time data
The dashboards access the GoShare database in real-time (as the screen is painted)
- update the data – simply refresh the page in your browser (also useful if a filter is
not responding) - the dashboard will take some seconds to display – as it is doing a lot of processing to
get you the information
Dashboard Usage and Features
Filters
Each dashboard has a set of filters to allow you to subset the data – Each dashboard has multiple widgets to which filters can apply.

Date Filter
- Has multitude of options
- Select the
 icon to open date filter options
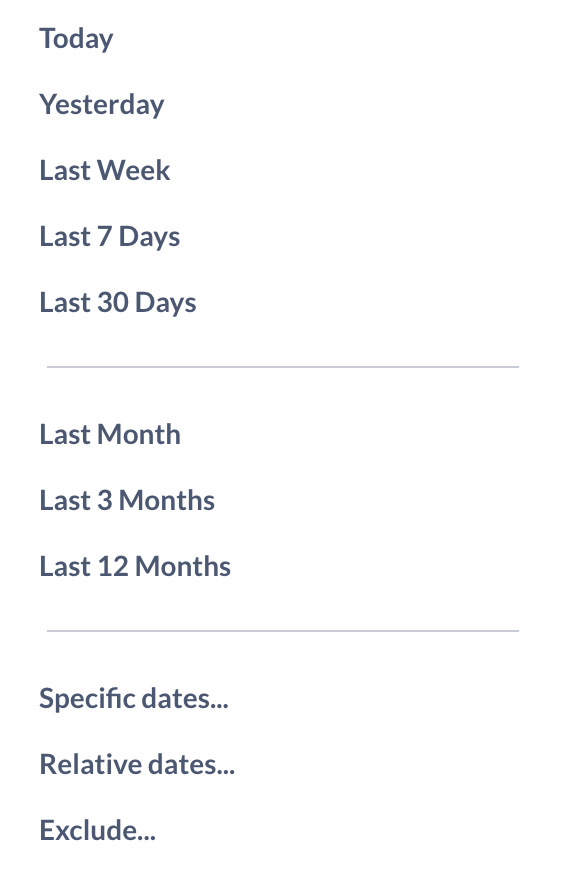
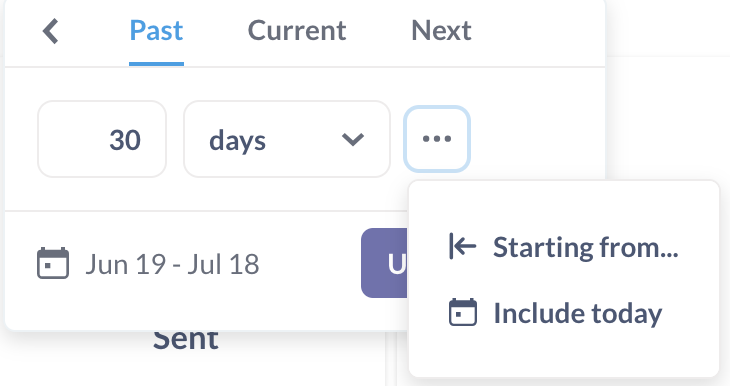
TIP: Dashboard defaults to not include today in date filter, to include todays data select the ellipsis and select ‘Include today’
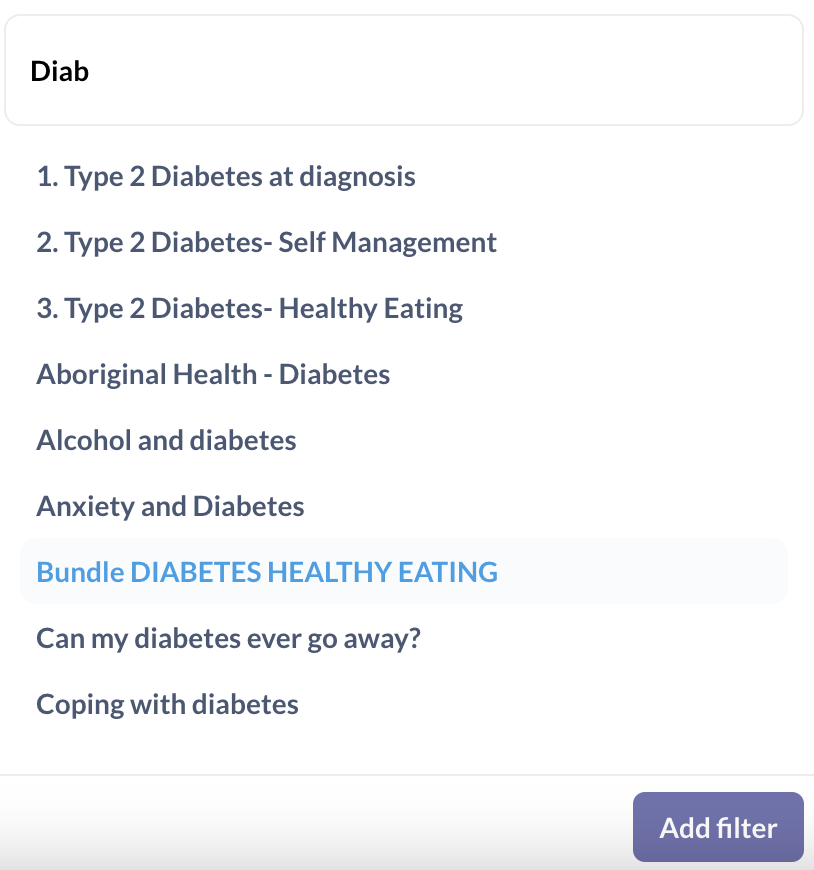
Text Filters
Start typing your search term and select from the list, if your search term doesn’t come up, it doesn’t exist in that data set
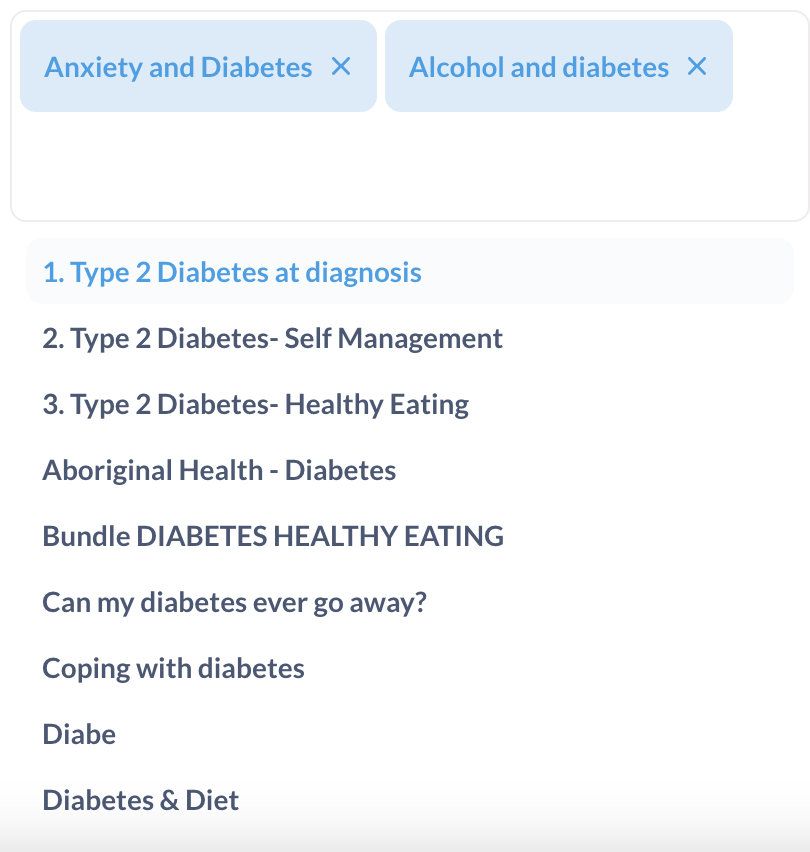
TIP: You can filter for multiple terms
Dashboard 2 – Detailed User Activity
Scroll down on the dashboard page to find find Dashboard 2
Dashboard 2 provides itemised lists of bundles sent, also of individual content items sent. This is particularly useful if you plan to build your own reports as it lists all of the information that we have on each Bundle/Content item sent.
TIP: To download the data from the any table or graphic, hover over the top right hand corner of that table or graphic and click the ellipsis. It will then prompt you to choose which format you would like the data presented
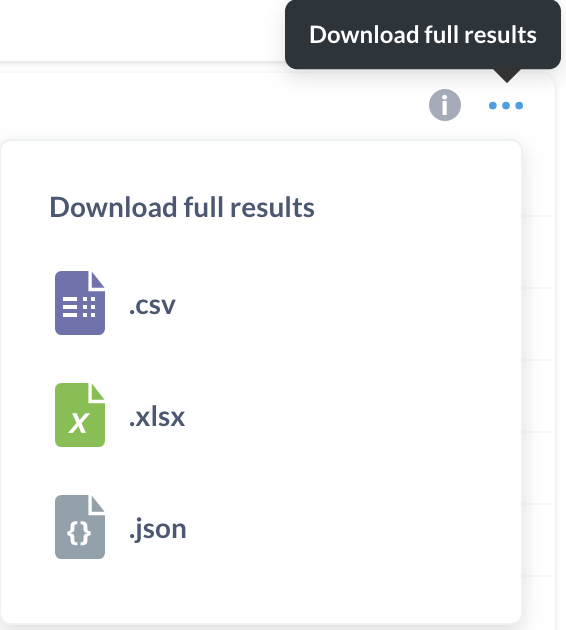
Table Scrolling/Sorting
Tables of data are presented pre-sorted by one of the columns
To SCROLL
- Bottom right corner of each table will display which rows are being displayed. eg. Rows 1-5 of 20
- Use the > for next page or < to scroll to previous page of the list
To SORT
- Click on any column heading to sort the data by that column
- The up arrow or down arrowhead at left of column title shows sort direction
- Click again to sort in reverse order
TIP: Hover over the ![]() icon for more information about that table or graphic
icon for more information about that table or graphic
Ongoing Enhancements
The dashboards will be frequently updated and enhanced. If you have any requests, please
email support@healthily.com.au
How to use GoShare as a Branch Administrator#
This GoShare tutorial introduces more advances functions of GoShare to users who have been assigned the role of a Branch Administrator.
Invite a new User to GoShare#
Invite a User
Navigate to the admin page of GoShare.
Click on the Users tab at the top of the screen.
Click on the ![]() icon on the bottom right hand corner of the screen.
icon on the bottom right hand corner of the screen.
In the Invite User page, complete the User details required and click ‘Submit’.
If a User with that email already exists, a message will appear on the screen.
An email address can only be used once. Another email address will need to be used.
If there is still a problem, contact Healthily for assistance. Phone 03 9534 7222, 1800 60 33 33 or email support@healthily.com.au
If the invitation is successful, the new User will appear on the User screen.
You can click on ‘Resend Invite’ at a later stage if the invitation has not been accepted.
Invite or create another Branch Administrator
You can assign administrator rights to another member of your organisation.
If you wish to create a new user with Admin access, follow the steps for Invite a User. Select ‘Branch Administrator GoShare User’ at the bottom of the screen and click ‘Submit’.
If the user already exists select the ellipsis ![]() on the right hand side of the user record, and select ‘edit’.
on the right hand side of the user record, and select ‘edit’.
Toggle from ‘Standard GoShare User’ to ‘Branch Administrator GoShare User’ and click ‘Submit’.
Can Share Bundles to Branch
Standard GoShare Users will only be able to share bundles with other users within their branch if you check the ‘Can Share Bundles to Branch’ box whilst inviting them or in the ‘edit’ screen.
Branch Dashboard and User report#
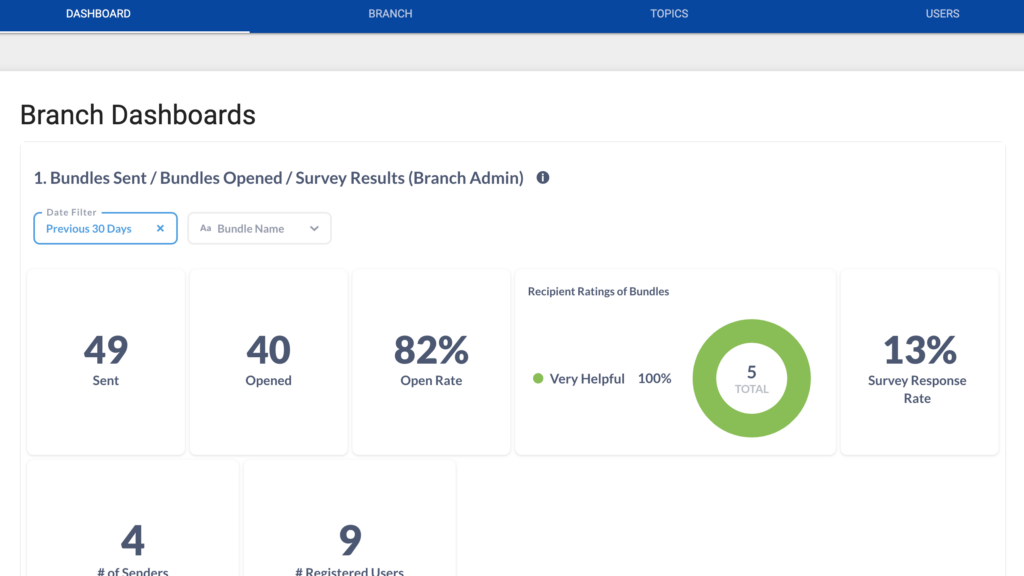
As a Branch Administrator, you have access to the Branch Dashboards.
Branch Dashboards can help you analyse and summarise your data. Each graph and table allows you to view GoShare usage from a different perspective. You are able refine the data using the filter boxes provided. ![]()
You are also able to download the data to view in Excel or your chosen program by selecting the download icon ![]() from the right hand corner of your chosen table.
from the right hand corner of your chosen table.
For more information, see the GoShare Dashboards – Quick Reference Guide ( https://healthily.com.au/wp-content/uploads/2020/12/GoShare-Dashboards-Quick-Ref-Guide-V1.1docx.pdf )
User report
The user report contains details about each of the Users set up in your Branch.
Click on “Download Report” to generate a .csv report which will open in Excel.
Get Started#
Get Started
Accept your invitation
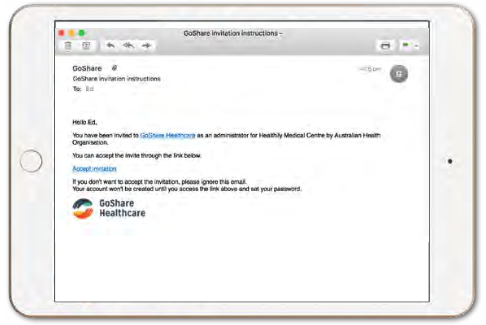
You will receive an invitation email from the Organisation Administrator.
Click on Accept Invitation link to accept. Enter password. Confirm Password.
Click on “Set my Password”. You will land in your Administration area.
You will see two tabs at the top of the screen – Branches and Users. The Menu icon is at the top left-hand side of the screen.
Customising your Branch#
You will be taken to the Branch customisation screen when you first create your account. You can also navigate to this page via the ‘Admin’ option from the settings. ![]()
This page allows you to customise the emails and SMSs sent from your Branch.
Branch Name
This is the name given to your health organisation at set up. It may be included on the recipients email or SMS greeting when you customise this copy. You can modify your Branch name by typing in an alternate name.
Branding
You can upload your chosen branding type in .JPG or .PNG format.
Logo dimensions are: width 300px height 150px
Banner dimensions are: width 1140px
Footer banner dimensions are: width 1140px
Pro Tip: Scroll to the bottom of the page and click ‘Update’ to save your chosen image.
Contact Healthily (support@goshare.com.au or 03 9534 7222) if you require assistance in formatting or resizing your logo.
“Send From” email address
Enter an active generic email for your health organisation. This email address should be monitored although the recipient is notified that it is a No Reply message.
GoShare requires that the “Send From” email address is authenticated by our email provider to prevent GoShare emails going into the recipients “Junk” folder. Email addresses hosted by a third-party Internet Service Provider (ISP) and on a public domain cannot be authenticated. This includes services such as Gmail, Hotmail, Yahoo, and Bigpond.
The default “Send From” email will be goshare@healthily.com.au until your email address is authenticated.
Type in your preferred “Send From” email address. The “Email approval status” will remain Unconfirmed until authenticated. This does not stop emails being sent by Users.
You will receive an email from our email provider Postmark, to verify your email. Simply click on the link to verify. The “Email approval status” will change to “Confirmed”.
Alert Email
If you are using GoShare to send communications that can record responses, you can enter an email address to receive alerts when a new response is received.
Customise the branding, email & SMS message template to the recipient
Under Default copy, you will see a drop down with branding options. These correspond to the branding images you upload in the top section of this webpage. This is applicable to the email only.
The messages has been prepopulated with default wording. You can customise the template text for both Email and SMS. This will be the template for the health practitioners in your Branch. They can further customise and personalise before they send their information to the recipient. The right-hand column explains which fields will self-populate from data in the system.
Customise the greeting message on the recipient content page
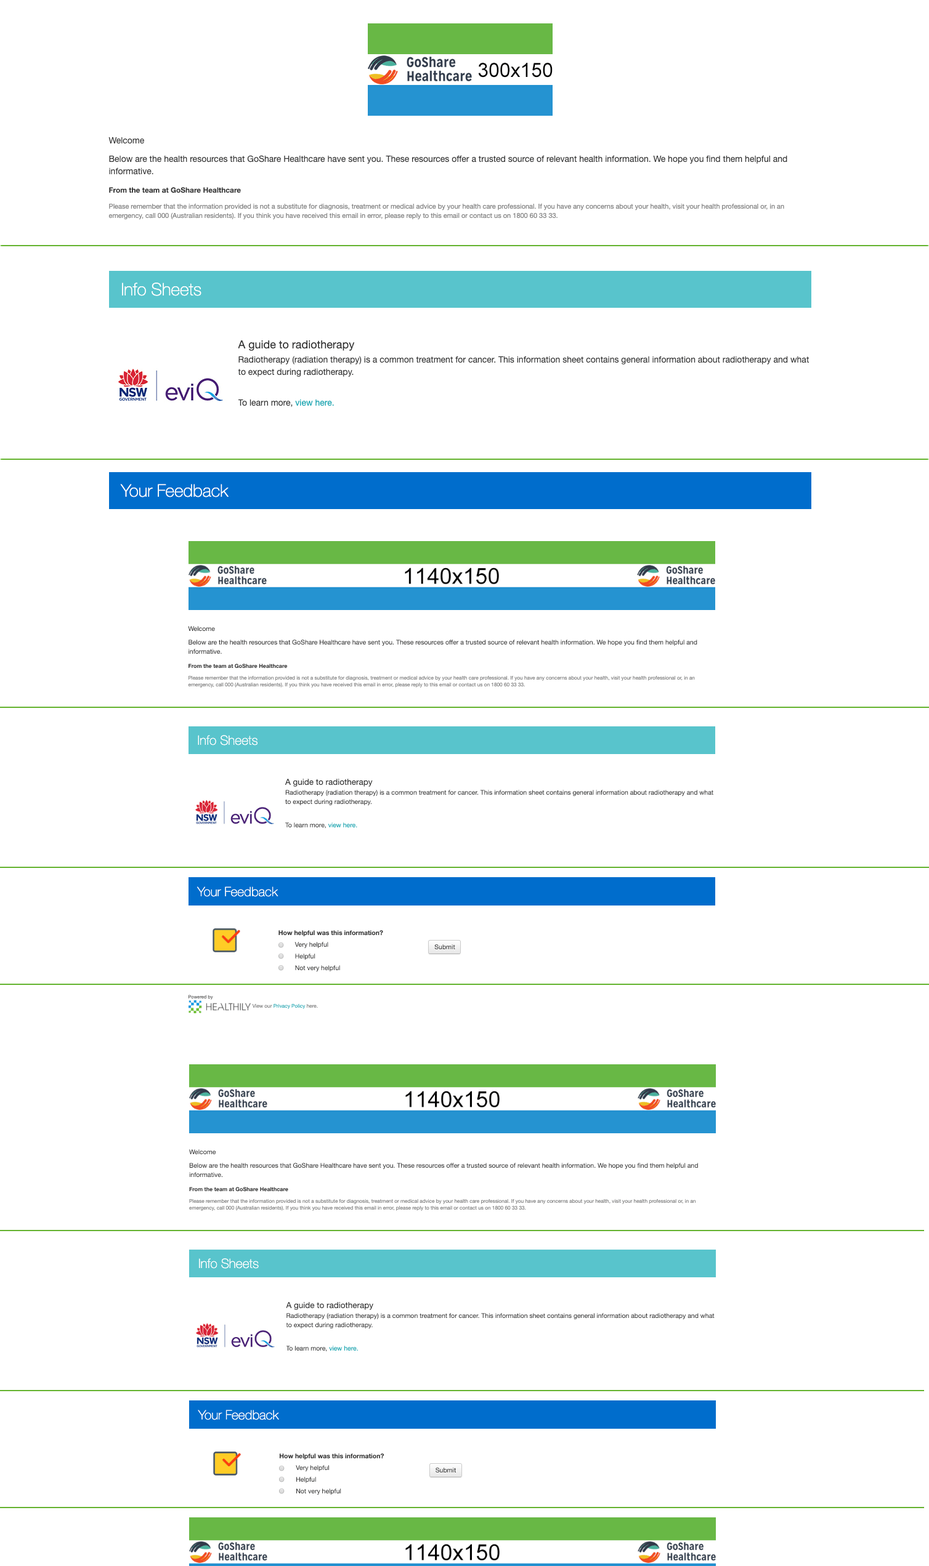
Landing page designs refers to the content page branding options. You are able to select from different options depending on your branding images you’ve uploaded to GoShare. If you want their to be Footer Link on your Landing page, you must select and option with Footer Banner selected.
This is the greeting message that will be first viewed by the recipient when they open their link to view the content. The message has been prepopulated default wording. You can customise this for your Branch. This cannot be further customised by the health practitioner.
When you have completed the page, click “Update” and the information will be saved. You can go back into the Branch Administrator screen at any time to modify as required.
Footer Link
You can use the footer branding as a clickable link on your Landing Page. This may be helpful to promote any health related campaigns you are running.
For this link to be active you must make sure:
- The ‘Use footer link’ check box is ticked
- A valid URL is entered into the ‘Footer link’ field
- The ‘Landing page design’ drop down has one of the footer link options selected
Phone number and Booking Button
You are able to include your Practice’s/Department’s phone number in your GoShare correspondence to direct recipients to call you after receiving a bundle. You can add this to bundles you’ve built yourself, or it may be built into Bundles that come with your version of GoShare. Enter in your Phone Number as well as any Online Booking Link to make sure recipients can contact you when you send your next campaign.
You are able to add the tag [Booking_button] to your landing page message to insert a clickable Button that directs recipients to your chosen webpage. You will need to enter the text you want to present on that button in the ‘Booking Button – text on the Button’ field. Eg. ‘Click here to book’ or ‘Visit our website’
Split Send Parameters
This section is only applicable if you are using GoShare Plus available in your Cat4 data analytics tool. If you want to find out whether you are eligible to use GoShare Plus, please contact GoShare Support on 03 9534 7222 or email support@goshare.com.au.
When sending a GoShare bundle to a list of patients, you may find that the number of patients on the list is too large. GoShare allows you to set split-send parameters which will:
- Check the number of patients in your list
- If it exceeds the maximum you have set, split the list into smaller lists
- Sends the GoShare bundle to each list at the chosen interval (days)
For example:
- You set a maximum list size of 300
- You set an interval of 7 days
- If you create a list of 850 patients to send a GoShare Bundle to, the Split-send feature will activate and only send the first 300 bundles initially.
- The remaining 300, then 250 GoShare bundles will be scheduled to be sent one and two weeks later, respectively.