What is GoShare#
GoShare enables health professionals to send their patients customised resources, quickly and easily.
Content available on GoShare#
This short video explains the different content types available for you within GoShare
Explaining GoShare to patients#
This video provides some tips and language to use when describing the GoShare digital patient education platform to patients. This can help to increase trust from the patient’s perspective and open rates as a result.
Patient Engagement Tips#
Prior to sending a bundle to a patient, check if the patient:
- consents to receive digital education sent to their device/email – they can opt out anytime by replying STOP to the SMS,
- has access to a device to receive information electronically,
- has adequate data or wifi to receive information digitally.
When you ask permission to send the information to your patient, explain what they will receive, and suggest they keep an eye out for it.
Eg. ‘You will receive an email (or SMS) from GoShare Healthcare with information about [topic]. You have an opportunity to let us know how helpful it was at the bottom of the content page.‘
Click here to download the GoShare Healthcare Patient Brochure which you may print and provide to your patient, or make available in the waiting room.
Other tips include:
- Ask the patient for feedback about the information sent to them at the next appointment (refer to it, ask them if they understood the information, ask if they have any questions).
- If sending by SMS, reassure the patient that when they receive an SMS from the service/department that it is not spam – they can safely open the link. The name of the service/department (and the patient’s first name) will be in the SMS message.
- If sending by SMS include the service/department contact phone number to increase credibility, if appropriate.
- If possible, clinicians should familiarise themselves with the patient experience of GoShare so that they can describe it to patients if asked:
- You will receive an email or SMS from us
- Click/tap the link in the message
- This will take you to a content page with helpful information
- You are able to give us some feedback
- Teams could send bundles to each other before starting to send to patients.
- Do not include too many content items in a content bundle. Aim for 2-4 content items where possible.
If the patient has limited data or wifi, you may choose to limit the amount of video’s sent to the patient. Please see below some context regarding the data required to view GoShare content:
- the video content on GoShare (the ‘stories’) are typically 30-40MB in size. A couple of the longer videos may be around 70MB,
- The animations are usually around 50-60MB,
- The PDF resources (most of which are found in the ‘info sheets’ section) are usually 2-3MB in size.
To put that in perspective:
- a standard $15p/m phone plan includes 5GB of data ( approx 5,000MB).
- This plan could watch one of the larger videos (60MB) on GoShare about 80 times.
Get Started#
NOTE: You may have access to GoShare via your organisation’s practice software or electronic medical record. Check if there are separate instructions to access GoShare via your organisations intranet.
Accept an invitation
- You will receive an invitation email from the Branch Administrator.
- Click on Accept Invitation link to accept. Enter password.
- Confirm Password. Click on “Set my Password”. You will land in your home screen.
Setting up the GoShare shortcut icon
- The GoShare icon can be dragged and pinned to your taskbar or on the Desktop.
Sign In to GoShare
- When you sign In to GoShare tick the “Remember Me” box and your user name and password will be saved for that computer.
Sign Out from GoShare
- Click on the
 icon in the User Navigation Bar. Click on Sign Out .
User Navigation Bar#
On the top right-hand corner of your screen is the User Navigation Bar.

![]() – will always return you to the main content selection screen.
– will always return you to the main content selection screen.
![]() – will take you to the content bundle screen to create a new bundle and view saved bundles. From here you can send your bundle.
– will take you to the content bundle screen to create a new bundle and view saved bundles. From here you can send your bundle.
![]() – will take you to the program screen to create a new program or view saved programs. From here you can send or schedule your programs.
– will take you to the program screen to create a new program or view saved programs. From here you can send or schedule your programs.
![]() – will take you to the screen to view your recipient list, what has been sent and what is scheduled in the program queue.
– will take you to the screen to view your recipient list, what has been sent and what is scheduled in the program queue.
![]() – allows you to edit your details, change your password, access the GoShare Knowledge Base, or sign-out.
– allows you to edit your details, change your password, access the GoShare Knowledge Base, or sign-out.
Create and send a bundle#
Select content, create, save and send bundles.
See Content available on GoShare to understand the content types available for you in GoShare
Sending a bundle – video
This GoShare training video explains the process of searching for content, selecting content items to add to a bundle, saving a bundle, then sending a bundle.
Edit recipient contact profile
Click on ![]() icon in the User Navigation Bar. Type in their name in the Search Recipients field. Potential matches will show in the drop-down box. Select the correct recipient and the name will appear in the top of the screen. Click the
icon in the User Navigation Bar. Type in their name in the Search Recipients field. Potential matches will show in the drop-down box. Select the correct recipient and the name will appear in the top of the screen. Click the ![]() icon and select “edit recipient” to add or change any details.
icon and select “edit recipient” to add or change any details.
Create a bundle
From your home screen, select a health topic by scrolling through the list or use the Search function by typing key words into the search field.
Select the Health Topic
The content modules are in the tabs in the top right hand of your screen under the User Navigation Bar. These include: Patient Stories, Videos, Info sheets, and Apps & Tools
Select a tab and scroll down the list of content items.
Use the search tool bar located in the tabs INFO SHEETS and APPS & TOOLS to find a specific resource/topic within the resources. You can also type the name of language into the search to find translated material.
Click on each item to view and select as many content items as required by clicking on the ![]() icon next to each item. To remove content, click on the
icon next to each item. To remove content, click on the ![]() icon.
icon.
You can see the content in your bundle is accumulating in the orange circle next to the ![]() icon in the User Navigation Bar.
icon in the User Navigation Bar.
When you have finished selecting your content items, click on the ![]() icon to view your bundle.
icon to view your bundle.
In your bundle screen, you can review and edit your selection.
To remove an unwanted content item, click on the ![]() icon.
icon.
You can click on the ![]() icon to send the bundle (titled or untitled) or continue to save the bundle. If you do not save the bundle, it will disappear once sent to the recipient.
icon to send the bundle (titled or untitled) or continue to save the bundle. If you do not save the bundle, it will disappear once sent to the recipient.
Save a bundle for future use
If you would like to save your bundle without sending to a recipient, click on the “Save bundle” icon.
A system generated number will be created for your bundle.
To change the title, click on the ![]() icon next to the number. Click “Update Title”, type in new title and click the tick “✓”. Your saved bundle will appear in the left-hand column under Your Bundles with the new title. You can change the title at any time by selecting the bundle from Your Bundles, click on the
icon next to the number. Click “Update Title”, type in new title and click the tick “✓”. Your saved bundle will appear in the left-hand column under Your Bundles with the new title. You can change the title at any time by selecting the bundle from Your Bundles, click on the ![]() icon next to the title and repeat the Update Title process.
icon next to the title and repeat the Update Title process.
You can find your saved bundles at any time by clicking on the ![]() icon in the User Navigation Bar.
icon in the User Navigation Bar.
Bundle settings
For instructions on how to customise your bundles and bundle library, click here
Delete a bundle
Bring up your bundles by clicking on the ![]() icon in the User Navigation Bar. Select the bundle you would like to delete. Click on
icon in the User Navigation Bar. Select the bundle you would like to delete. Click on ![]() icon next to the title. Choose ‘’Delete bundle”. The system will ask you to confirm deletion. The bundle will be deleted from Your Bundles, but still accessible to the recipient through the URL link.
icon next to the title. Choose ‘’Delete bundle”. The system will ask you to confirm deletion. The bundle will be deleted from Your Bundles, but still accessible to the recipient through the URL link.
Send your bundle
From Your Bundles screen, click the ![]() icon. Click “Close” to discontinue.
icon. Click “Close” to discontinue.
Send to a New Recipient
Click ![]() . Enter the recipient’s name, ID (if required), Email address and/or mobile number. Click “Done” to save. This will create the recipients contact profile.
. Enter the recipient’s name, ID (if required), Email address and/or mobile number. Click “Done” to save. This will create the recipients contact profile.
Send to an existing recipient
If you have previously sent the recipient a bundle from GoShare, their first name and contact details will be retrieved when you start tying their name in the “Existing recipient name” field. Click on Email Message and/or SMS Message. You can modify the message or leave as per default text and click ![]() icon. The recipient will receive the message with their First Name in the Recipient field.
icon. The recipient will receive the message with their First Name in the Recipient field.
Send to more than one recipient
You can send to multiple recipients at once by simply repeating the steps for Existing and New recipients. Each recipient will receive a unique email/SMS and content page and cannot see other recipients’ names or details.
Send to list
This GoShare training video explains how to import a list of recipients to GoShare in the format of a Comma Separated Values (CSV) file. These files are commonly produced when exporting demographic information from another software program such as a hospital EMR (Electronic Medical Record) or clinic PMS (Practice Management Software). The Send to List feature is a particularly efficient way to send one bundle to multiple recipients in one activity.
This is helpful if you are trying to communicate with a large group and don’t want to manually enter recipients into GoShare, one by one. Detailed instructions about how to prepare the list are on GoShare with a tutorial below:
You are also able to download a template .csv which you can use to build your list of recipients.
To access the ‘Send to list’, select your chosen bundle and click ![]()
Send another bundle to list
Access to this functionally is limited. Contact the support team on support@goshare.com.au for access to this function
This video covers the process of selecting a group of recipients who have already been sent a bundle using the ‘send bundle to list’ function and configuring another sent activity to that same group of recipients. This includes the ability to configure a ‘nudge’ or ‘follow up’ SMS to be sent only to recipients who have not opened the bundle from the original activity.
This functionality is commonly used to setup ongoing large group education programs where recipients have agreed to be sent ongoing health education over a specified time period. nb: Recipients can still reply STOP at anytime to be unsubscribed from the activity.
Customise your Messages
Click on ![]() in the top right of the screen and the default text messages will appear on your screen.
in the top right of the screen and the default text messages will appear on your screen.
You can customise each message in the email and/or SMS before sending. The [recipient] field will automatically populate with the recipients first name. Simply click in the SMS message and delete, add or amend your message.
Edit Bundle Copy
You are able to create a custom message for each one of your created bundles.
All GoShare bundles will have default copy applied passed down from either your Organisation or Branch. To edit this for a specific bundle click on the bundle menu ![]() and select ‘Edit Bundle Copy’
and select ‘Edit Bundle Copy’

You will be able to edit the Email, SMS, and Landing page copy of a bundle. First you must check the box of which copy you would like to edit.
You are able to go in and type your new message.
SMS messages from GoShare have a character limit of 296 characters. There is a counter down the bottom right of the SMS Message field that allows you to see how many you have used.

Customise Default Bundle copy
If you are a Branch Admin, you are able to change the default message that is seen by users within your Branch when they send a bundle that doesn’t already have Bundle Copy applied.
For instructions on how to customise your branch settings within the Branch Admin suite, click here
Bundle settings#
Search and find saved or shared bundles
To help you find bundles from your library that you have saved, there is a search feature available to you

Start typing into the search bar and results will be displayed either under ‘Your Bundles’ for bundles you have created.
or your organisation, practice, or departments shared bundles under the relevant heading.
If you have ‘Categorised’ your bundles, you can quickly access bundles from each category from the drop down list under the search. This is a helpful feature when your Bundle Library is starting to become extensive.
Bundle Menu ![]()
The bundle menu allows you to customise your Bundle for its chosen purpose

Set bundle category
Categorising bundles allows you to organise your bundle list into categories making it easy for you to find them when you need them.
This GoShare training video explains how to add a category to a saved bundle, which makes it easier to find your bundles in your favourites area.
To add a bundle to category, select the bundle menu ellipses ![]() and then select ‘Set bundle category’
and then select ‘Set bundle category’
You will then be able to either add the bundle to an existing category by checking the box,
or Create a new category for you bundle to feature in by entering your Category title into the field at the bottom of your Category list.
Make sure to click ‘Save’ to save any changes.

NOTE: Each bundle can only be in a maximum of 2 categories at one time
Edit Bundle Copy
You are able to create a custom message for each one of your created bundles.
This GoShare training video explains how to make changes and customise an existing pre-packed bundle.
All GoShare bundles will have default copy applied passed down from either your Organisation or Branch. To edit this for a specific bundle click on the bundle menu ![]() and select ‘Edit Bundle Copy’
and select ‘Edit Bundle Copy’

You will be able to edit the Email, SMS, and Landing page copy of a bundle. First you must check the box of which copy you would like to edit.
You are able to go in and type your new message.
SMS messages from GoShare have a character limit of 296 characters. There is a counter down the bottom right of the SMS Message field that allows you to see how many you have used.

Create copy of bundle to edit
If you need to add or remove resources from an existing bundle, or if you have been shared a bundle that you wish to make changes to, you can select ‘Create copy of bundle to edit’ from the Bundle Menu.
This GoShare training video explains how to make changes and customise an existing pre-packed bundle.
Once selected, your chosen bundle will move into your ‘Unsaved Bundles’ where you will be able to remove any unwanted items by selecting the trash can icon ![]() or add new items by going back into the content library and selecting
or add new items by going back into the content library and selecting ![]()
Once you are happy with your selection, you can select ‘Save Bundle’ to add it to your library. At this point you may want to remove the old bundle if it is no longer needed.
Delete bundle
If you ever need to remove a bundle from your Bundle library you will need to seelct ‘Delete bundle’ from the Bundle Menu.
NOTE: If a bundle is deleted from your library, the details of it and the reporting data is still kept on the Dashboard
Permissions
Permissions allow you to share you created bundles with others from your Branch or Organisation. To share a bundle select ‘Permissions’ from the Bundle Menu.
Depending on your level of access (Org Admin, Branch admin, or regular User), will determine who you will be able to share you bundle with. Select the appropriate option from the list.

NOTE: If you are wanting to share your bundle with your branch, you must select it from the list, which may require you to scroll to find it
Adding copy to a bundle#
This GoShare training video explains how to add copy to a content bundle, which enables you to customise a bundles SMS, email and landing page messaging.
Create a program and schedule bundles#
This GoShare training video explains how to create an automated digital program or ‘schedule’ of bundles to be automatically sent to patients over a specified time period. This is particularly useful is the clinical areas of pre/post surgery, rehabilitation programs and maternity.
You can create and schedule a digital program by combining saved bundles which can be delivered to recipients over time at defined intervals.
Click on the ![]() icon in the User Navigation Bar. Click
icon in the User Navigation Bar. Click ![]()
To name your Program, click on the ![]() icon, select Update Title, type in new name and click to save. Your saved Program will appear in the left-hand column.
icon, select Update Title, type in new name and click to save. Your saved Program will appear in the left-hand column.
To get started, decide on the number of content bundles in your program and how these might be sequenced. Create the bundles as per the above steps. When creating a bundle for a program, each bundle should be given a topic name and number to ensure it is easy to sequence them.
Bundle 1
Click “Add Bundle”. Click “Select” under Bundle 1 and choose from your saved bundles.
You can customise the text message for email and SMS for this bundle. You can choose to send either an email, an SMS or both by ticking the boxes. The [recipient] field will automatically pick up the recipient’s name when it is sent.
You can save progressively after each bundle is added or continue to the completion.
Bundle 2 and more
Scroll down and click on “Add Bundle” and Bundle 2 will appear. Click “Select” and choose from your saved bundles. Continue to add bundles and customise as required until you have completed your program.
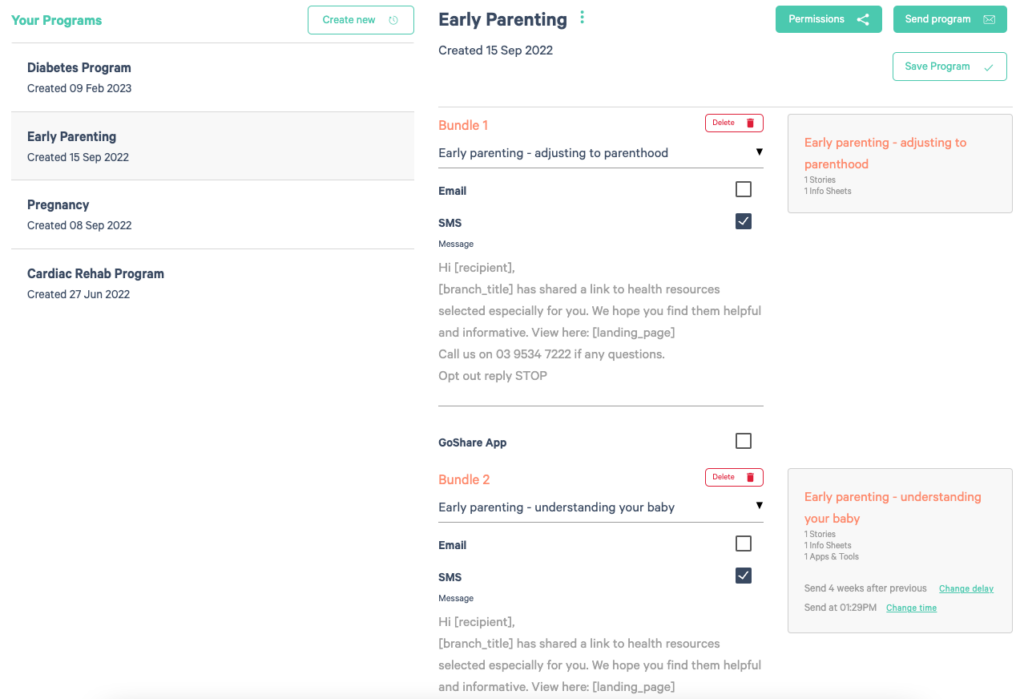
Click ![]() to schedule the bundles
to schedule the bundles
When you have finished adding the bundles and have created your digital program content you can schedule them (or you may choose to schedule each bundle as they are added to the Program).
The default send schedule is for the first bundle to be sent immediately on clicking “Send Program”
with one-week intervals between the other bundles.
On the right-hand side, you can set the delay interval between bundles by clicking “Change Delay”, selecting days or weeks and then a number. Click on “Set Delay”. Do this for each bundle.

You can choose the time of day for the bundles to be sent by clicking “Change Time”. A clock will appear. Select the AM PM, hour, and minute. Click OK to set the time.

When you have finished creating your program Click on ![]() . Your saved programs will appear in the left-hand column and can be sent at any time.
. Your saved programs will appear in the left-hand column and can be sent at any time.
Bundle 1 will be stored in the program and sent on the day you send the program to a recipient (Change Delay set to ‘’0’’).
Send a Program
Click ![]() Type in an existing recipient name, or add a new one.
Type in an existing recipient name, or add a new one.
Click on “Date to send”. The Calendar will default to the current date “Today”. Either click “OK” or change the date which will trigger the first bundle to be sent. Click “OK” to save the changed start date. Click ![]()
Recipient List#
Click on the ![]() icon in the User Navigation Bar.
icon in the User Navigation Bar.
There are two tabs in the top right of screen – Sent and Queue.
In “Sent” and you can view each of the bundles sent and whether (or when) the patient has opened the link to access the information.
If the recipient has opened and viewed the content, the word “Viewed” will appear on the right-hand side of the bundle with date and time first opened. Click on the down arrow to get further detail.
Your recipient list is on the left-hand side of the screen. Select the recipient and see what has been sent and whether it has been accessed.
Click on the “Queue” tab to see the bundles in your programs that have been scheduled but are yet to be sent. Click on ‘’Remove from queue” to remove any bundle from this current “send” version (this will not change the Saved Program, just this send instance). Click on “Change date” to modify the date a bundle is sent.
To generate a report, scroll to the bottom of the screen and on the left hand side click either ![]() or
or ![]() to create a .csv file will be produced and viewed in Excel.
to create a .csv file will be produced and viewed in Excel.
Provide Feedback#
On the right of the screen is a Feedback tab. Click the Feedback tab, select Problems, Suggestions, Compliments or Other, and fill in the text box. Click Send Feedback. Your feedback will be received by the Healthily team via the monitored email.
Uploading new content to GoShare#
We are constantly adding new content to our already substantial online patient education library, this is an ongoing task and we encourage new content requests from customers.
Ensuring that every hospital, health service and medical practice has access to the most relevant digital patient educational material to their needs is one of the highest priorities of the support team.
To request new content to be added, please download and complete the below form then email to support@goshare.com.au.
Prior to submitting a content upload request, please ensure that you have addressed your own organisations internal governance processes to ensure the resources are appropriate for use within your organisation.
Please click here to download a copy of the Content request upload form.
Healthily will then seek approval from the content owners before making resources available on GoShare. This approval process is often fast tracked due to relationships already in place between Healthily and peak health bodies around Australia.
As a general rule, GoShare provides users with access to resources developed by credible Australian health organisations only. Organisations using GoShare may also choose to deactivate any topics or have content removed from their custom version of GoShare.
For more information, see Governance Privacy and Security – GoShare Knowledge Base (healthily.com.au)
GoShare Dashboards Explained#
How to Access the Dashboards
Every User has a personal dashboard comprised of their sending history. Access by selecting ‘Dashboard’ from the settings ![]() cog.
cog.
Additional dashboards are available for users with Branch/Segment, or Org admin capability.
Access by selecting ‘Admin’ from the settings ![]() cog.
cog.
| Dashboard | Who has access | How to access | Data | Example |
| User Dashboards | All GoShare users | Via “Cog” menu / select “Dashboard” | Only the logged in user | Health Professional |
| Branch Admin Dashboards | GoShare users with Branch Admin capability | Via “Cog” menu / “Admin” – then select “Dashboard” Tab | All users within the logged in user’s Branch | GP Practice, or a Hospital department etc. |
| Segment Dashboard | GoShare users with “Segment Reporter Role” | Via “Cog” menu / “Admin” – then select “Segment Dashboard” Tab | All users and branches allocated to that “Segment” (aka “Managed by”) | LHD, Health service, A grouping of GP Practices |
| Organisation Admin Dashboards | GoShare users with Org Admin capability | Via “Cog” menu / “Admin” – then Org Dashboard is on the “Organisation details” tab | All users across all branches within the logged in user’s Organisation | A PHN, Govt Health Agency, or a company etc. |
Real time data
The dashboards access the GoShare database in real-time (as the screen is painted)
- update the data – simply refresh the page in your browser (also useful if a filter is
not responding) - the dashboard will take some seconds to display – as it is doing a lot of processing to
get you the information
Dashboard Usage and Features
Filters
Each dashboard has a set of filters to allow you to subset the data – Each dashboard has multiple widgets to which filters can apply.

Date Filter
- Has multitude of options
- Select the
 icon to open date filter options
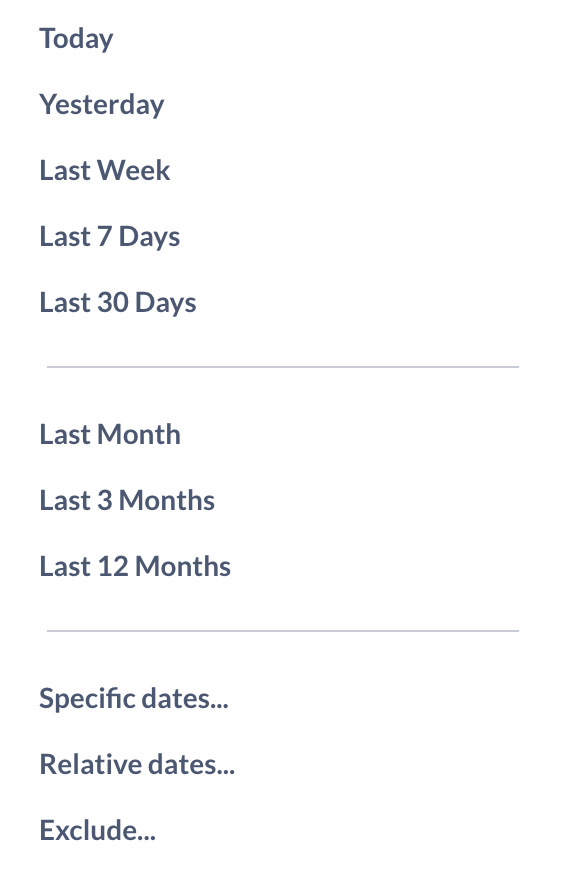
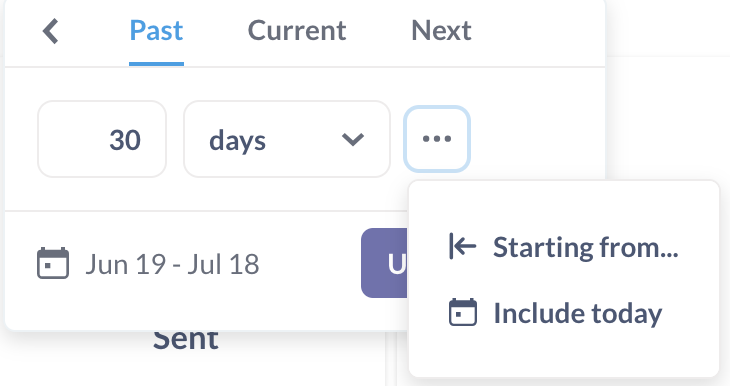
TIP: Dashboard defaults to not include today in date filter, to include todays data select the ellipsis and select ‘Include today’
Text Filters
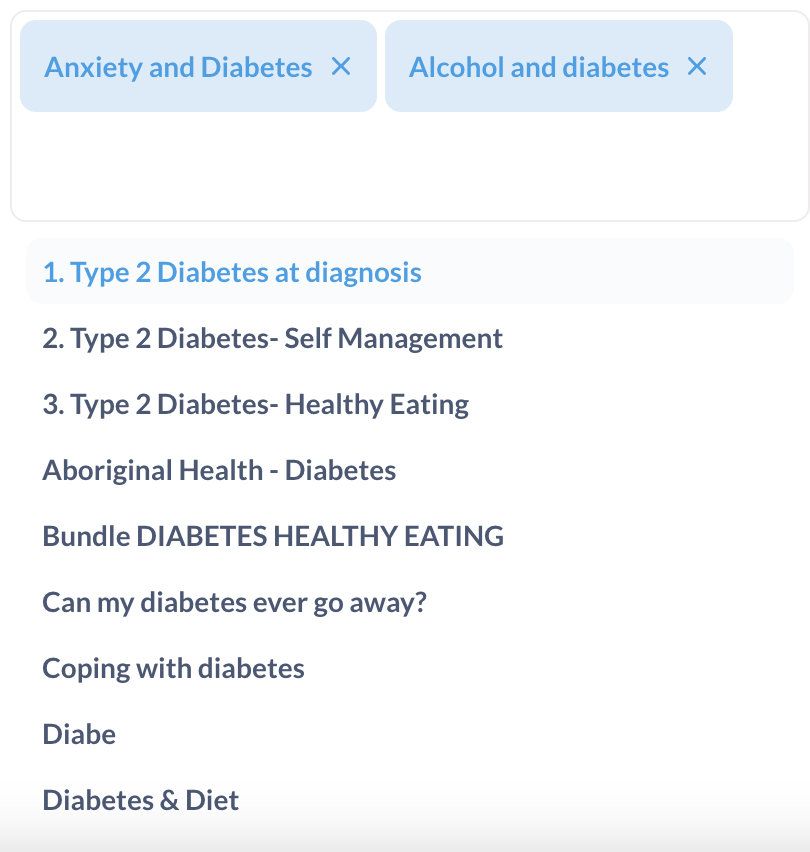
Start typing your search term and select from the list, if your search term doesn’t come up, it doesn’t exist in that data set
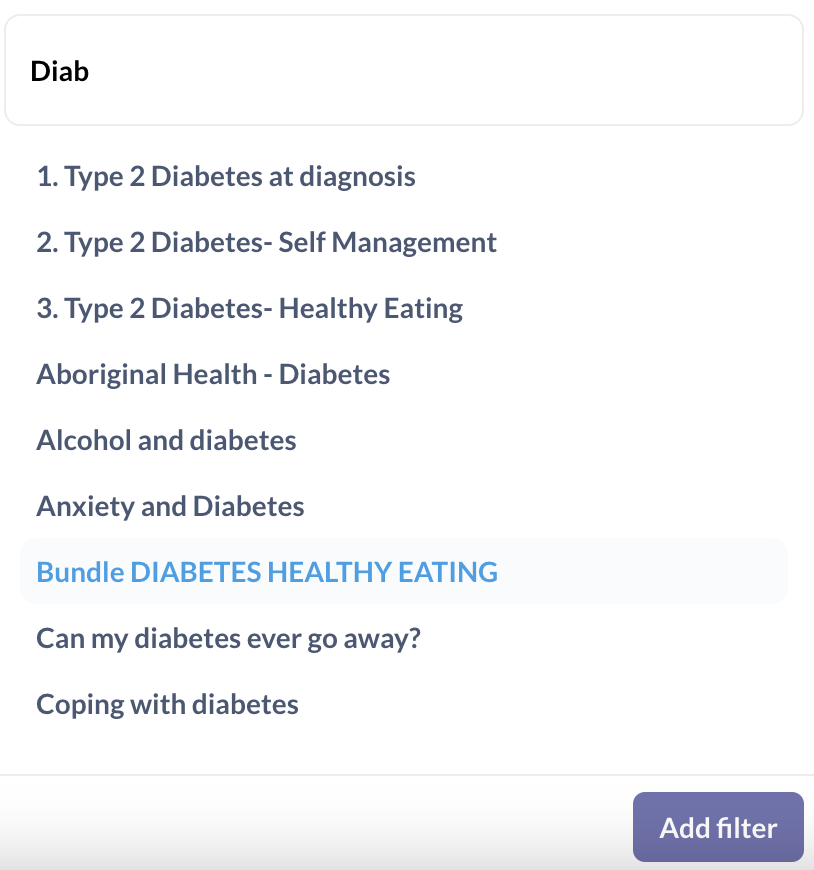
TIP: You can filter for multiple terms
Dashboard 2 – Detailed User Activity
Scroll down on the dashboard page to find find Dashboard 2
Dashboard 2 provides itemised lists of bundles sent, also of individual content items sent. This is particularly useful if you plan to build your own reports as it lists all of the information that we have on each Bundle/Content item sent.
TIP: To download the data from the any table or graphic, hover over the top right hand corner of that table or graphic and click the ellipsis. It will then prompt you to choose which format you would like the data presented
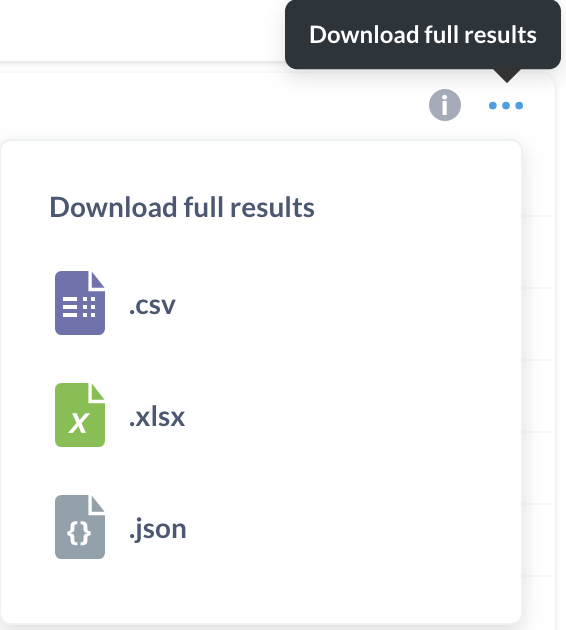
Table Scrolling/Sorting
Tables of data are presented pre-sorted by one of the columns
To SCROLL
- Bottom right corner of each table will display which rows are being displayed. eg. Rows 1-5 of 20
- Use the > for next page or < to scroll to previous page of the list
To SORT
- Click on any column heading to sort the data by that column
- The up arrow or down arrowhead at left of column title shows sort direction
- Click again to sort in reverse order
TIP: Hover over the ![]() icon for more information about that table or graphic
icon for more information about that table or graphic
Ongoing Enhancements
The dashboards will be frequently updated and enhanced. If you have any requests, please
email support@healthily.com.au